Daily writing prompt
What’s the most profound piece of advice you’ve been given? Did you take it?


Why work so hard towards something you no longer believe in?
Yes.

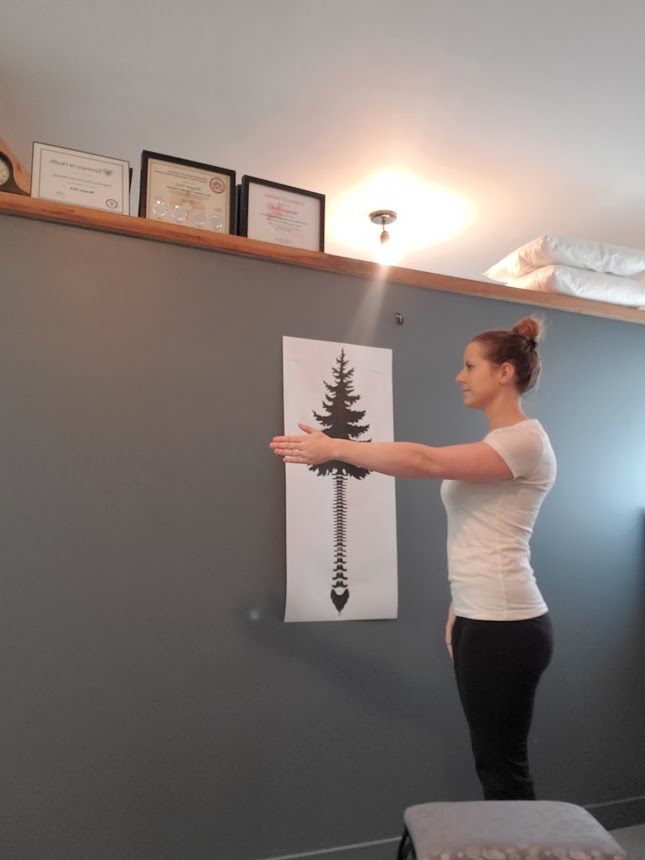
Best in Massage & Manual Osteopathic Therapy, Serving Ladysmith, Duncan, Cowichan Valley & Vancouver Island
Why work so hard towards something you no longer believe in?
Yes.

Understanding the contraindications of infrared sauna use is essential to ensure one’s safety and well-being. Ignoring these contraindications can lead to adverse health effects. For instance, contraindications like cardiovascular issues, certain skin conditions, pregnancy, and medications that affect thermoregulation can increase the risk of overheating or exacerbate pre-existing health conditions. Acknowledging and adhering to these contraindications helps individuals avoid potential harm, ensuring that they can safely and effectively enjoy the benefits of infrared sauna therapy while safeguarding their health.
*Pregnancy; A relatively safe temperature 39° (102.5) or 70° (158) if under 20 minutes or 33.4° (92.1) if under 45 minutes.
*Absolutely no alcohol usage
*Hypotension particularly in the elderly age. Note, if your blood pressure has been constantly and consistently low then it is not necessarily hypotension
*Recent myocardial infarction
*Unstable Angina Pectoris
*Severe Aortic Stenosis
-Altered/ Reduced sweat function Multiple Sclerosis Central Nervous System Tumor Diabetes with Neuropathy
*Medication- Ask your physician if the infrared sauna is safe when using any prescriptions. SSRI’s and hyper intensives are examples of medications making in unsafe to use hot hydrotherapy.
*Heat increases stress on the cardiac system, increasing blood flow and the heart rate has the potential to increase by 30 beats per minute for each degree of increase of core temperature.

Shotgun Method- Goals: To realign pubic tubercles
Correcting the misalignment in the pubis is crucial for maintaining overall pelvic and musculoskeletal health. A misaligned pubis can lead to discomfort, pain, and even long-term issues such as pelvic floor dysfunction, back pain, and gait abnormalities. By addressing this misalignment, individuals can improve their quality of life, alleviate discomfort, and prevent the development of more serious health problems, ultimately ensuring better mobility and physical well-being.
Technique to fix misalignment in the Pubis-
1. Assess your pubic tubercles while laying down, and determine if they are even or not. If you do not know what this means, book your next appointment with your favourite Massage/Osteopathic therapist before continuing to the next steps. The is the first step to fixing the misalignment in the pubis
2. Client supine on the spine, knees bent into flexion, with the ankle medial malleoli close, and knees together because remember this means hips are aligned!
3. Warm up your muscles by gently resisting abduction and adduction (squeezing knees inwards and outwards) with a maximum of 10 % effort held for 10 seconds with 3-5 repetitions.
3. Position 1-2 pillows between the knees, and then with a quick rare 100% effort, squeeze the knees together for 1 second and then release. Expect loud crepitus with or without discomfort which should dissipate after contraction. You are using your legs like levers to create a shift in the pubis to align. Safe to hold in a strong squeeze for up to seconds, pain is a good reason to stop!
4. Reassess the alignment of the pubic tubercles, if not still not even, leave it to the professionals and BOOK NOW at www.myislandmo.com


Cranial Sacral Therapy (CST) is a method of assessing misalignments in the body by observing restrictions in the flow of cerebrospinal fluid. This is the fluid surrounding the brain and spine, which is responsible for carrying nutrients from the bloodstream and eliminating waste. It also functions as a protective encasement of the central nervous system (CNS).
The ebb and flow of cerebral fluid can be restricted due to impingement of a nerve, or lack of blood flow. Nerves travel between and beneath bones, muscles, and fascia (connective tissues), so misalignment can occur anywhere along their route and the results can be: decreased range of motion or function, decreased sensation, or pain and discomfort.
Some underlying neurological conditions will have an impact as well and can also be treated with CST.
https://preventingalzheimers.com/what-is-cranialsacro-therapy/
Regarding Cranial Sacral Therapy in osteopathy, practitioners are trained to observe subtle movements across the cranium and throughout the skeletal system. They can detect minute differences in the way cranial bones expand and contract, and in the direction they rotate as the client breathes.
Although the eight cranial bones “fuse” together during the first two years of life, those sutures are not inflexible. The connective tissue between them allows for a subtle range of motion. These bones follow a measurable pattern of motion based on breath, and the interchange of blood and cerebral fluid.
The motion of the skull is not arbitrary. Restrictions in movement can mean there is an impingement, or even a lesion. When observing restrictions between cranial bones and along key points called “listening stations,” osteopaths can determine whether other symptoms in the body have a source in the central nervous system.
For example, if someone is suffering from numbness or tingling in their fingers, CST can be employed to discover how far down the neck, shoulder, or arm the nerve is being affected. If someone is experiencing migraines, the osteopath may discover a restriction in the vertebrae of the neck or even between the cranial bones.
The practitioner begins by watching the primary respiration—that is, the client’s natural inhale and exhale while they lie prone. The bones of the body expand and relax at 6-9 seconds intervals, based on that breath. Restrictions can also be observed in different types of motion, i.e., walking, sitting.
The osteopath employs certain holds to detect the internal and external rotation of these points:
When a restriction is located, an osteopath is able to provide gentle, hands-on adjustments. If the area moves too much or too fast, they will stabilize it. If it doesn’t move or it is restricts you, they will mobilize it.
Adjustments can be performed anywhere along the spine, on the bones of the cranium, and between which there are joints. The sutures of the cranium are designed to accommodate the imperceptible movement of cerebral fluid as well as to cushion the brain on impact. Movement between the cranial bones can be detected during the various vault hold assessments.
Common disorders in the (CNS) include subluxations, lesions, and external or internal rotation dysfunction.
Subluxation- misalignments or dislocations of the spinal bones, putting pressure or impingement on the nerves that innervate them (go through them).
Lesions- restrictions in the fascia, bone, joint, or muscle, such as: open wounds and scar tissue; torn muscle/tendon/fascia; inflamed tissues; growths; cysts; and tumors.
Rotation Dysfunction- Over flexibility in the joints one way or the other.
The practitioner needs formal education in Cranial Sacral Therapies and should also be trained in involuntary mechanisms such as lymphatic drainage and other techniques involving Cranial Sacral Therapy Rhythm. There is a surprising amount of dysfunctions that can be treated at the cranial bone fusion sites, including:
Headaches and Migraines
Chronic Neck and Back Pain.
Traumatic Brain Injury and Concussion
Stress and Tension-Related Disorders
Motor and Coordination Impairments
Brain and Spinal Cord Injuries
Chronic Fatigue
Infant and Childhood Disorders
TMJ Syndrome
Scoliosis
Fibromyalgia
Central Nervous System Disorders
Learning Disabilities
ADD/ADHD
Post-Traumatic Stress Disorder
Orthopedic problems
and many other conditions.
Cranial Sacral Therapy (CST) can relieve chronic pain and tension and offer a renewed range of motion and blood flow through the brain, spine, and entire body. Often, the effects will be immediate.
For the best results, clients should follow their treatment plan and return to their osteopathic practitioner to be sure the adjustments have made a lasting difference.
For more information on craniosacral therapies, consult your healthcare practitioner. They can advise you on any contraindications to the practice as well as direct you to complementary techniques.
https://www.upledger.com/therapies/faq.php
Manual Osteopathic College of Canada; 2020 Involuntary Mechanisms
Dumbbell curls: Stand with feet shoulder-width apart and comfortable, Dumbbells in each hand, held loosely, in a neutral position (meaning your thumb is forward, not turned in or out to the side). Avoid locking out your knees, elbows, or wrists. Keep everything relaxed. Then when you begin the curl, your thumbs naturally rotate out so that your palms face up at the end of your flexion. Your upper arms remain at ease, and you simply bend at the elbow. When you slowly reverse the curl, your wrists rotate to return with your thumbs forward.
Match your breathing to the exercise by breathing out when you curl and breathing in when you lower back down. Emphasize smooth, even breathing with smooth, even motion. Begin with less weight until you can easily and fluidly add more.
Begin with the same stance as a dumbbell curl, but do not rotate the wrist as you lift. Rather, hold the dumbbell as if it were a hammer the whole time. You can curl one arm at a time to maintain proper form, and then take the curl across your body to target more of the biceps.
For the sideways curl, begin with your arms held loosely at your sides, then bend one arm at a time, at the elbow, with the dumbbell crossing your body and lining up parallel to your torso. Follow the same smooth line of motion to return to the starting position and remember to breathe out as you curl and in as you relax.
You can do this exercise from a standing or seated position. Hold one dumbbell between both hands by gripping one end between your palms, fingers in a triangle around the shaft. Raise the dumbbell above your head into position. Keep your elbows glued to your ears, meaning the bend is in the elbows, not the shoulders.
When you bend your elbows, you will lower the dumbbell behind your head. Be mindful of the weight and difficulty of this exercise, and remember that the exercise should be smooth and precise. You can breathe in as you lower the weight behind you, and breathe out as you raise it again.
Bicep injuries tend to stem from repetitive strain or from maxing out with weights. Of course, you can use curls to target the biceps, and you can use bands to provide lengthening.
Use weights or a band with enough stretch to comfortably hold under both feet and get into the curl position with your feet close to shoulder width apart. You can find a range of exercises that help to strengthen not only your biceps but also the smaller muscles that serve to support your arms’ ROM.
A tricep tear can be rehabilitated with weights and band work also, and although people may be hesitant to purchase bands, there are benefits to the investment. Otherwise, a towel may be used for gentle dynamic stretching.
This global stretch also targets the triceps- With one elbow bent above the head, hold the top of the towel, and with your other hand gripping the bottom behind your back, softly and evenly pull the towel down, keeping some resistance to protect your shoulder and elbows.
When people say they’ve injured their shoulder, that could have implications for multiple muscles and ligaments intersecting at the head of the humerus bone. Shoulder shrugs can be helpful for muscles including the trapezius and levator scapula. Abduction or lateral flexion is great for the deltoids, supraspinatus, and biceps. Flexion for the anterior deltoids, pectoralis major, biceps brachii, coracobrachialis, and supraspinatus. Extension for triceps, latissimus dorsi, teres major, and posterior deltoid, and the list goes on. Working with an osteopathic practitioner can help identify target areas and tissue globally and focally.
Normalize exercising your arms so that you have a steady routine you can count on until you return to your original strength and musculature. Incorporate a healthy diet, that allows your body is nourished and thriving.
Joint rotations: Simple wrist, elbow, and shoulder clockwise and counterclockwise rotations can help to maintain healthy ROM for each joint in your arm. Roll your shoulders slowly forward ten times, breathing steadily, and then change direction. Do ten elbow circles, following the natural bend and extension of the joint, before changing direction and repeating the process. Follow up with ten wrist circles going both directions.
Gentle stretching can help relieve tight muscles after they’ve been worked out. Avoid overstretching or “pulsing” (repetitive stressful pressure during the stretch). Instead, think about relaxing into each stretch so that your muscles are elongated and allowed to freely release and lengthen.
An easy workout for strengthening the arms is to choose one of the 2 following types of exercises:
*Isotonic Exercise: Producing limb movement without change in muscle tension. The action is performed on the exhale.
10-12 repetitions, 3 sets, 1-4 times a week. (30 seconds- 1-minute break between sets)
*Isometric Exercise: Meaning the muscle stays the same length. Hold contractions for 5 seconds, 8-10 reps. 2-3 sets, 1-4 times a week. (30 seconds to a 1-minute break between sets)
* Stretching time can be anywhere from 2 seconds to 2 minutes, depending on the goals set with your practitioner. Keep the range of motion healthy, and do not stress joints that are hypermobile or have ligament laxity into exaggerated or intense ranges of motion.
*Dynamic Stretching– Gentle stretches with little to no holding time, pulsing, pendulum swinging, or gentle passive or active circles of the joint to ease into the stretch without fully relaxing tissue. Most beneficial mid sport/activity/day, or times when the body will still need to be ready for action.
Static Stretching- A slow gentle, ease into a stretch and held most often 20 seconds to 2 minutes. This is where it is especially important to keep ROM healthy, as in zero discomfort, and stretch where tissue is restricted. Utilize the inhale and exhale of your breath to find softening and ease in each position, relaxing further as you follow the breath out. Choose to strengthen instead where joint integrity is compromised and where there is hypermobility or ligament laxity.
Book your appointment with Island Manual Osteopathic Therapies and find out more about regaining arm strength. Remember, there is no age limit or weight limit for muscle building or rehabilitation. What is most important is your attitude and autonomy. Are you able to rest when you need to and strengthen when you can? That is all that is required for you to meet your expectations for your body.
Our bodies are incredible in that they can heal themselves regardless of what we’ve been told or what we’ve told ourselves. Working with Manual Osteopathy means that the emphasis is on using the body’s systems to maintain optimal health and equilibrium.
-If you do not have weights, use bands.
Next, if you do not have bands, use household items like soup cans.
-If there is pain beyond mild discomfort, try focusing on a slow range of motion exercise without weight. Find a pain-free range of motion in each of the 6 directions and let that be where you start and build up. weight, and ROM as you improve muscle tone and strengthen and finally stretch.
-Remember, even though this is the focus for the arms, the whole body should be engaged, meaning:
– Strong posture
-Slight bend in the knees
-Weight in the heels of your feet
-Strong and engaged stomach with the belly button towards the spine
-Tuck your chin, lift your head, and lengthen the spine.


Whether you’ve suffered an injury, or you’ve had your mobility compromised, it can be difficult to rebuild the strength and range of motion (ROM) of your arms. Healing alone can take weeks, and even months. Sometimes ineffective training after an incident can lead to long-lasting loss of muscle and strength.
Make sure the injury is healed before you begin to strengthen. Also speak with your medical practitioner. We are taught as kids to power through the pain. But we are not often shown what that means when our body it isn’t fully healed. Tearing new muscle over an injury can cause pain and damage to the new tissue. This can lead to a longer period without full function.
So, while you are still in the healing process, your MO will either recommend complete rest, or they will give you some practical ways to improve your prognosis. Methods can include heat on stiff muscles, or ice on tender, swollen ones. KT tape may also be used to improve the pain of daily activity and alleviate stress in specific areas.
One of the most frequently asked questions is where to start! Knowing where to start to improve shoulder function, discomfort, or limited range of motion is important. So the purpose of this post is to help understand the full range of motion available in the shoulder. And allow the reader can take this information and apply therapeutically in a way to support discrepancies. If the range of motion is restricted by discomfort or weakness, you need to lessen the intensity and work under that threshold with low to zero weight or resistance, and let that be the starting point. If ROM is restricted by muscle tension, consider all ranges of motion of the shoulder, and apply a stretching technique where indicated.
Strengthening and Stretching techniques can be applied to any range of motion and descriptions will be found in Step 3.
Once you are ready to re-engage your muscles, an MO can assess the tissues being affected by your injury and they can recommend tests to pinpoint the problem(s). They should ask about your history to discover any repeat injuries or dysfunction. They should also ask you about your daily routines and what sorts of triggers cause you discomfort or pain.
There are six key Ranges of Motion (ROM) in the glenohumeral joint (shoulder joint) to take into consideration as you target specific areas of the arms. Your MO will be able to show you the proper technique for each muscle group. Please consider these actions when deciding to strengthen the shoulders globally.
Let’s start with Flexion and Extension. Discomfort is a reminder to reduce the range of motion or weight/resistance. This is so that the work is done under the pain threshold. If the shoulder can not move into full extension or full flexion, ensure weight/resistance is low to improve strengthening and follow with a stretch after the full strengthening cycle. Utilize the other arm to support a gentle stretch of the arm in the range of motion of restriction. Only hold static stretches when telling the body it can relax and no longer needs to perform as in: at end of a workout or end of the day. Dynamic stretches are important in the interim, review Step 3 for more information about these stretching techniques
Your MO will be able to perform manual adjustments and massage with you during your visit. They will also be able to recommend exercises at home. Pay attention to the subtle corrections to your alignment and posture and be willing to ask questions! This will help you regain strength in your arms.
Regardless of the site of weakness, the emphasis needs to be on slow, smooth movement through a full range of motion. Though you may be targeting different muscles, you want to encourage proper form and even development of the muscles. It is important to exhale on the action when strengthening. Utilizing the exhale as a driving force to complete an action.
Exercises for the forearms will still engage the biceps and triceps and can include standing dumbbell curls and hammer curls, along with tricep extensions. Before you begin, your MO will want to take note of your starting point for ROM and strength. This is to later gauge your progression.
There can be hesitation about following up with your MO once the first treatment is complete. But it’s important to observe and report back on what improvements you’re seeing (or not seeing) and which exercises you’ve kept up with.
Regardless of where you are in your healing and strengthening process, an MO can guide you. This is because they know how to assess for specific injuries or dysfunctions and what actions to prescribe. To regain strength in your arms takes time and dedication.
For further information on how to regain strength in your arms and perform these exercises do not hesitate to reach out!
More Info on Strengthening Range Of Motion in your Arms


